
How to Film Food for Instagram Reels with Your Phone
To film food for Reels, plan a short shot list (hero, process, texture, “money shot”), shoot vertically next to a window with the light coming from the side or behind the dish, and capture plenty of short, steady clips with motion: pours, pulls, steam and cuts. A macro lens adds the close-up texture shots that make people stop scrolling.
Here’s a workflow you can repeat for every recipe, café visit or menu launch.
Plan the Reel before you cook
Food waits for no one. Cheese sets, ice melts, steam disappears. Write a quick shot list before you start so you aren’t improvising while the dish dies on the plate. A strong 15–30 second food Reel usually includes:
- The hook (0–2 seconds): the most satisfying moment first, such as a cheese pull, a sauce pour or a knife through a crust.
- Ingredients: quick overhead shots of raw ingredients being added.
- Process: chopping, sizzling, stirring, plating.
- Texture close-ups: crumb, glaze, bubbles, sugar crystals.
- The hero: the finished dish, styled and lit.
- The bite: a fork, a spoon or a hand lifting a piece toward the camera.
Shoot each moment as a separate 3–6 second clip. Short clips are easier to cut to music and keep the pace fast.
Light: the single biggest upgrade
Food looks best with soft, directional light. A window with no direct sun is ideal.
- Side light shows texture: the ridges on pasta, the crumb in bread.
- Back light (light behind the dish, camera facing the window) makes steam, drinks, sauces and oils glow. It’s the classic food-video look.
- Avoid overhead kitchen lights and mixed sources. Warm ceiling bulbs plus cool daylight give muddy color. Turn the ceiling lights off when you film by the window.
- Use a white card or a piece of foam board opposite the window to lift shadows.
If you film at night, one LED panel diffused through baking paper, placed to the side and slightly behind the food, imitates window light surprisingly well.
Camera settings for food video
- Vertical 9:16, 4K or 1080p. Shoot in 4K if your phone and storage allow; it gives you room to crop and punch in.
- Frame rate: 30 fps for normal clips, 60 fps or higher for pours and drops you want to slow down.
- Lock exposure and focus before you start each clip so the phone doesn’t pulse brightness when a hand enters the frame.
- Lower exposure slightly to protect white plates and shiny sauces from blowing out.
- Turn off cinematic or portrait video for close-ups; it can produce strange edges around forks and steam.
- Clean the lens. Kitchen grease on the camera glass is the number one cause of hazy, glowing food footage.
Angles that work for each dish
Overhead (90°)
Best for flat foods: pizza, bowls, charcuterie boards, cookies on a tray, and step-by-step recipe videos. Use a phone arm or tripod with a horizontal mount so the frame stays still and square.
Three-quarter (about 45°)
How diners actually see a plate. Good for plated meals, pasta and salads.
Eye level (0°)
For tall foods: burgers, layered cakes, stacked pancakes and drinks. It shows height and layers.
Wide establishing shot
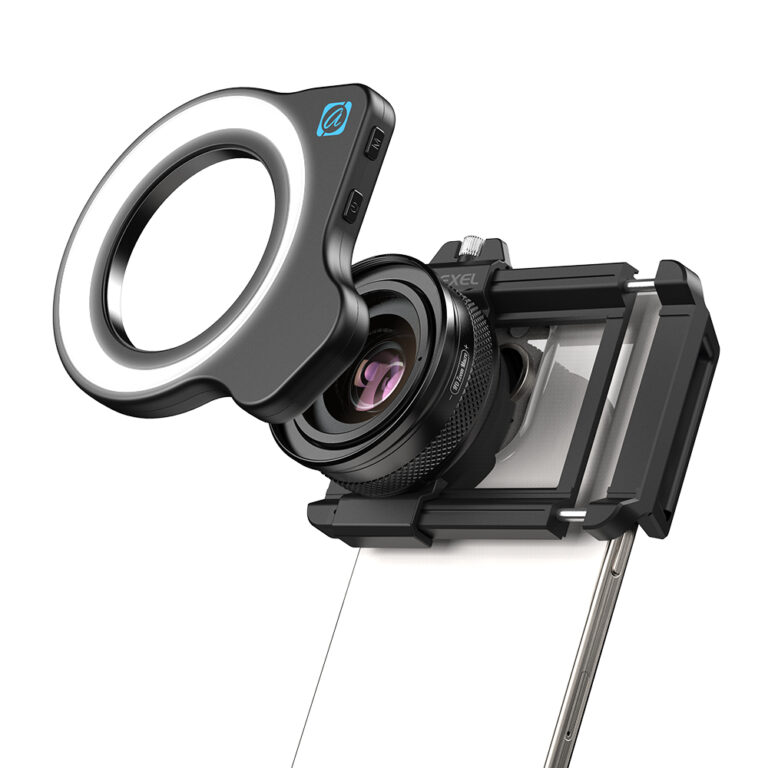
For cafés and restaurants, a wide shot showing the table, the room or the counter gives context. The 2-in-1 wide-angle + super macro lens covers both ends: unscrew the parts to switch between a wider view of a small café and close-up detail on the plate.
Close-ups that stop the scroll
Macro footage turns everyday food into something hypnotic: sesame seeds on a bun, bubbles in caramel, condensation on a glass, the flaky layers in a croissant. With the 100mm HD clip-on macro lens, you can fill a vertical frame with a single bite-sized area.
Tips for macro food clips:
- Use a tripod or rest the phone on the counter; macro magnifies every shake.
- Move the food, not the phone. Slowly slide the plate into focus, or rotate it on a lazy Susan.
- Back light makes glossy textures sparkle; side light brings out crumb and grain.
- Keep clips short (2–4 seconds) and cut them between wider shots.
Motion ideas for food Reels
- Pour: sauce, syrup, coffee or milk filmed at 60 fps against a dark background.
- Pull: cheese, mochi, noodles lifted slowly.
- Drop: berries into yogurt, ice into a glass, toppings sprinkled from above.
- Cut: a knife slicing a cake or sandwich to reveal layers.
- Slide-in: push the plate into frame on a still camera.
- Push-in: slowly move the phone toward the dish; a small gimbal makes this smooth.
- Steam: back light a hot dish against a dark wall. Steam is nearly invisible against bright backgrounds.
Styling basics
Use matte plates in neutral colors so the food carries the color. Wipe drips from rims with a paper towel. Add fresh garnish right before filming. Undercook vegetables slightly so they stay vibrant. Keep a spray bottle handy for a fresh, dewy look on salads and fruit. For drinks, a few extra minutes in the freezer gives a glass natural condensation.
Editing for Reels
- Open with your strongest clip. No slow intros.
- Cut on the beat of a trending sound or a steady music track.
- Use speed ramps on pours and pulls for drama, but sparingly.
- Add on-screen text for the dish name or recipe steps; many viewers watch without sound.
- Keep color natural. Food that looks too orange or too blue loses appetite appeal.
- End with the bite or the hero shot, and loop-friendly cuts help viewers rewatch.
For more general tips on stability, color and pacing, see our guide to making phone videos look professional.
Quick checklist
- Shot list written: hook, process, texture, hero, bite
- Window light from the side or behind, ceiling lights off
- Lens wiped clean of grease
- Vertical 4K, 60 fps for slow motion clips
- Focus and exposure locked per clip
- Macro close-ups and one wide context shot
- Plate rims cleaned, garnish added last
- Strongest moment first in the edit
FAQ
How long should a food Reel be?
Many food creators keep Reels between 7 and 30 seconds. Shorter is easier to rewatch; longer works for full recipes if the pace stays quick.
What’s the best time of day to film food?
Whenever you have bright, indirect window light, often mid-morning or afternoon. Avoid harsh direct sun unless you diffuse it with a sheer curtain.
Do I need a gimbal for food videos?
No. Most food clips are shot on a tripod with motion happening in the frame. A gimbal helps for walk-in restaurant shots and push-ins.
How do I film steam?
Back light the dish and use a dark background behind it. Film immediately after cooking and avoid fans or open windows that disperse the steam.
Give your food Reels texture people can almost taste.
Use the 100mm macro for close-ups and the 2-in-1 wide + macro for café scenes, or mix any three lenses with the Mix & Match – any 3 for $129 bundle. More gear in the shop, shipped free worldwide.