Phone Camera Filters for Sunset Photography: 2026 Guide
Why does your smartphone turn a masterpiece of a sunset into a blown-out white mess? You’ve likely tried to capture that perfect golden hour, only to end up with a sky that’s too bright and a foreground that’s completely black. It’s a common struggle for every mobile creator who wants to move beyond basic snapshots. This guide helps you master the art of light management using phone camera filters for sunset to achieve professional results. You don’t need a bulky DSLR to capture the magic of the horizon when you have the right tools in your pocket.
We agree that software alone can’t replicate the richness of a real sunset. Digital HDR often looks flat or artificial, losing the true depth and emotion of the scene. You’ll learn how to balance exposure and eliminate lens glare for stunning, high-contrast shots that look like they belong in a gallery. We’re going to dive into the essential hardware, including physical ND filters and the JJC Magnetic Lens Filter Mount Adapter, that will transform your mobile photography in 2026. Get ready to produce vibrant, professional-grade content that stands out on any feed.
Key Takeaways
- Understand why physical filters outperform software when managing extreme dynamic range during golden hour.
- Identify the best phone camera filters for sunset, including ND filters and polarizers that balance light and boost sky saturation.
- Discover how the JJC Magnetic Lens Filter Mount Adapter for iPhone lets you swap professional optics in seconds as the light fades.
- Follow a proven step-by-step workflow to scout your location and prep your gear for high-impact results.
- Elevate your creator kit with professional-grade glass that delivers authentic, viral-ready content without relying on artificial presets.
Why You Need Physical Phone Camera Filters for Sunset
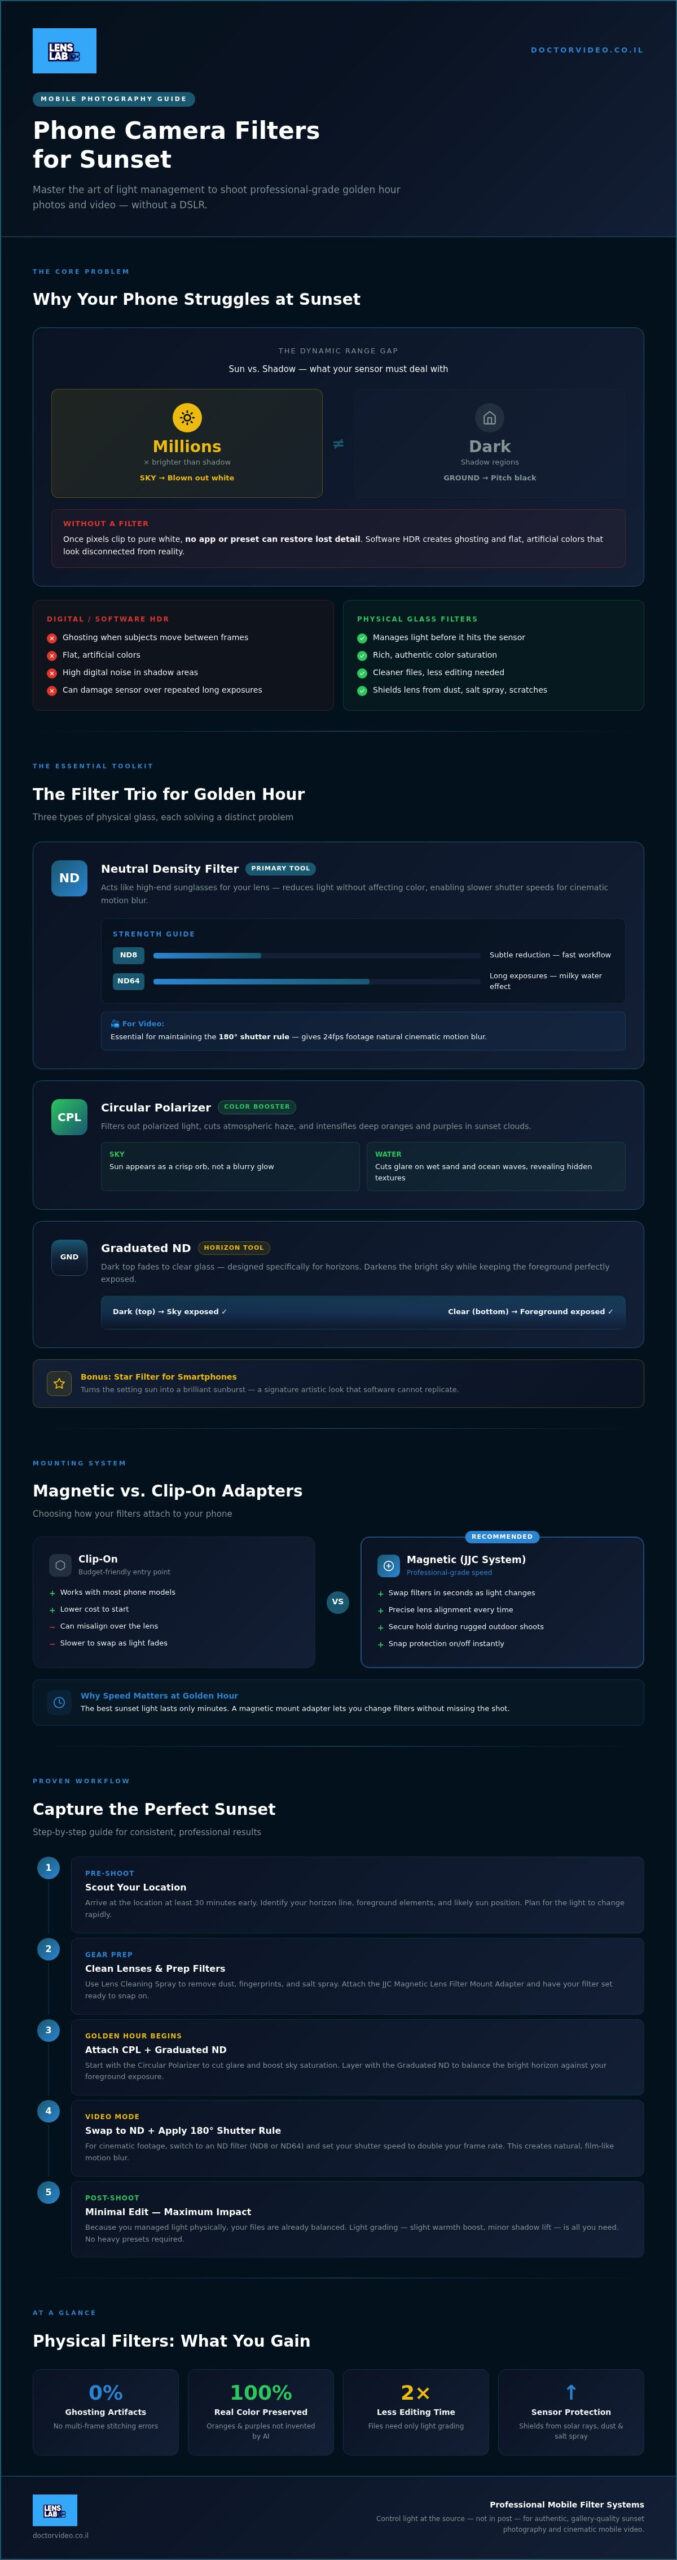
Your smartphone is a powerhouse; however, even the latest models face a physical wall when the sun hits the horizon. This is the dynamic range problem. The sun is millions of times brighter than the shadows on the ground. Your phone tries to compensate by taking multiple photos and stitching them together, but this often leads to “clipped” highlights. Once those pixels turn pure white, no app or preset can bring back the lost detail. Using physical phone camera filters for sunset allows you to manage light at the source. It prevents the sensor from being overwhelmed, preserving the rich oranges and deep purples that software simply invents.
Physical light reduction isn’t just for stills. If you want that smooth, cinematic motion in your sunset videos, you need to control your shutter speed. Neutral Density (ND) filters act like high-end sunglasses for your lens. They allow you to use slower shutter speeds without overexposing the frame. This creates natural motion blur that makes your mobile footage look like a big-budget production. By controlling light physically, you achieve natural color saturation that digital filters can only hope to mimic.
The Limits of Mobile HDR
Digital processing has come a long way, but it isn’t perfect. Mobile HDR often creates “ghosting” when clouds or people move between shots. It also tends to produce flat, artificial colors that feel disconnected from reality. Physical glass provides superior clarity. It ensures the light hitting your sensor is already balanced. This significantly reduces the digital noise often found in shadow areas when your phone tries to “force” an exposure in low light. You get cleaner files that are much easier to edit and share.
Protecting Your Sensors
Think of a filter as insurance for your creative gear. Pointing your phone directly at high-intensity solar rays for long exposures can actually degrade your sensor over time. A professional filter acts as a shield. It absorbs the brunt of the solar energy while keeping your primary lens safe from dust, salt spray, and scratches. Using the JJC Magnetic Lens Filter Mount Adapter for iPhone makes it easy to snap protection on and off in seconds. Always keep your optics pristine with a dedicated Lens Cleaning Spray. Maintaining a secondary glass layer is always smarter than risking a scratched primary lens during a rugged outdoor shoot.
The Essential Filter Trio for Golden Hour
Capturing a world-class sunset requires more than just a high-end sensor. You need physical phone camera filters for sunset to control the chaos of golden hour lighting. While software tries to fake the look, professional-grade glass delivers authentic results that stand out on any social feed. The essential trio for every creator consists of Neutral Density (ND) filters, Circular Polarizers (CPL), and Graduated NDs.
Graduated ND filters are specifically designed for horizons. They feature a dark top that fades into clear glass, allowing you to darken the bright sky while keeping the foreground perfectly exposed. This solves the “dark foreground” problem instantly. If you want to add a signature artistic look, consider a Star Filter for Smartphones. It turns the setting sun into a brilliant sunburst, adding a high-end aesthetic to your composition that software can’t quite replicate.
Using these tools allows you to manage light physically rather than relying on digital patches. This results in cleaner files, better color retention, and a more professional workflow. When you control the light before it hits the lens, you spend less time editing and more time creating. You can find these tools and more in our professional filter collections for mobile photographers.
Mastering Neutral Density (ND) Strengths
ND filters are your primary tool for time manipulation. Use an ND8 for subtle light reduction when you want to maintain a fast workflow. Switch to an ND64 for longer exposures to achieve that iconic milky water effect on coastal horizons. For videographers, these filters are essential for maintaining the 180-degree shutter rule. This ensures your 24fps video has the natural motion blur expected in cinema.
The Power of the Circular Polarizer
The Circular Polarizer is your best friend for color saturation. It works by filtering out polarized light, which effectively cuts through atmospheric haze. This makes the sun appear as a crisp orb rather than a blurry glow. It also intensifies the deep oranges and purples in the clouds. Beyond the sky, a CPL manages reflections on wet sand or ocean waves, revealing textures that would otherwise be lost to glare.
Magnetic vs. Clip-On: Choosing Your Mounting System
Choosing the right hardware to attach your optics is just as important as the glass itself. If your mount is clumsy, you’ll miss the peak of the golden hour. The market has evolved beyond generic plastic clips. Today, creators choose between precision magnetic systems and high-compatibility clip-on mounts. A secure connection is the only way to prevent light leaks that can ruin your long exposure shots. When light bleeds in from the sides, your phone camera filters for sunset lose their effectiveness entirely.
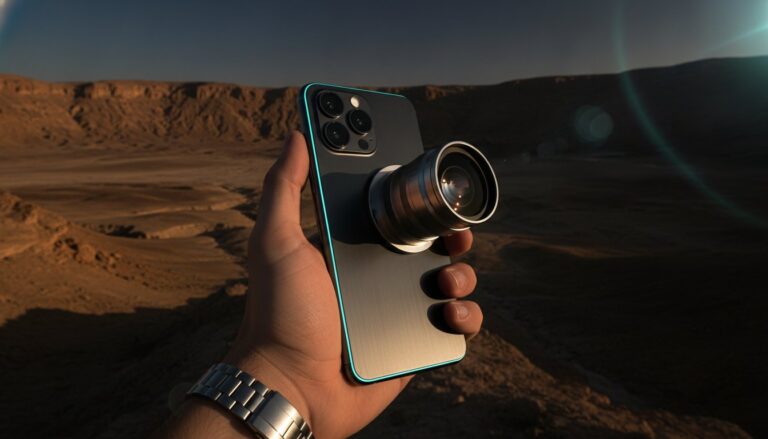
For iPhone users, the JJC Magnetic Lens Filter Mount Adapter for iPhone has set a new standard. It utilizes the phone’s internal magnets to provide a rock-solid foundation for 52mm filters. This system eliminates the struggle of threading glass onto a tiny clip while the sun is dropping. It’s about efficiency. You snap the adapter on, attach your filter, and you’re ready to shoot in under three seconds. This speed allows you to stay present in the creative moment rather than fumbling with gear.
Android users and those with older models still rely on clip-on systems. These are the universal soldiers of the mobile photography world. While they require a bit more care to align, they offer the flexibility to work across different device generations. Whether you go magnetic or clip-on, the goal remains the same: a light-tight seal that lets your professional optics do their job without interference. Proper mounting ensures that every bit of light passing through your filter is used to create a stunning image.
The Magnetic Advantage for Creators
Magnetic mounts offer a significant technical edge: zero vignetting. Because these adapters sit closer to the lens array, they don’t block the corners of your frame, even on ultra-wide lenses. This is a massive win for landscape photographers who need every millimeter of the horizon. Stacking filters also becomes effortless. You can combine a circular polarizer with an ND filter without adding significant bulk. Speed is the ultimate benefit here. When the light changes every sixty seconds, a magnetic snap saves your session.
Universal Clip-On Solutions
Clip-on mounts are perfect for creators who use multiple devices or switch between phone brands. To get the best results, ensure the clip is perfectly centered over your phone’s primary sensor. Misalignment can cause blurriness or strange light artifacts that software can’t fix. Look for clips with rubberized grips to protect your screen and prevent slipping during long exposures. These systems are incredibly portable. You can toss them in a pocket and be ready for a spontaneous shoot anywhere. Always store your mounting clips in a clean pouch to prevent dust from transferring to your lens during assembly.
How to Capture the Perfect Sunset: A Step-by-Step Guide
Timing is everything. Arrive at your location at least 30 minutes before the sun touches the horizon. This gives you ample time to scout the best angles and set up your gear. Use a weather app to track the exact sunset time and cloud cover. High-altitude clouds often catch the best light, creating those viral-ready pink and orange streaks. Once you’re positioned, mount your phone camera filters for sunset and use Lens Cleaning Spray to remove every fingerprint. Even a tiny smudge will bloom under direct sunlight, ruining your contrast and clarity.
Precision control starts with locking your settings. Tap the brightest part of the sky on your screen and hold until the AE/AF Lock message appears. Slide the brightness icon down to preserve the rich colors in the clouds. This prevents the camera from constantly adjusting as the light fades. Mastering the use of phone camera filters for sunset is the fastest way to elevate your portfolio. If you’re using a Circular Polarizer, rotate the front element slowly. Watch the sky deepen in color and the reflections on the ground vanish. If your shutter speed falls below 1/15th of a second, you must use a steady surface or a tripod. Professional shots require absolute stillness.
Setting Up the Shot
Always shoot in RAW format. Standard JPEGs compress the image data, making it impossible to fix exposure errors later. RAW files preserve every bit of light captured by the sensor, giving you maximum flexibility in post-production. For a true cinematic experience, try the PRO 1.55X BLUE ANAMORPHIC LENS FOR SMARTPHONE. It expands your field of view and adds professional horizontal flares that scream high-end production. For more advice on keeping your shots steady, explore our curated list of smartphone vlogging gear.
Advanced Mobile Techniques
Take your content further by using third-party apps with manual Long Exposure modes. These apps allow you to leave the shutter open for several seconds, which is where your ND filters truly shine. You can smooth out crashing waves or create soft light trails in the foreground. If the sky is still too bright compared to the ground, slide a Graduated ND filter into place. This balances the exposure across the frame instantly without needing digital HDR. Sometimes, removing the filter for a single shot can capture intentional, artistic flares. Experiment with both styles to see what fits your vision. Explore our full range of mobile optics to find your perfect match and start creating.
Elevate Your Creator Kit with LensLab Professional Optics
LensLab stands at the intersection of high-level mobile optics and creative freedom. We believe professional-grade results should be accessible to every creator with a vision. While software attempts to mimic the behavior of light, our professional glass delivers the real thing. Using phone camera filters for sunset ensures your colors are authentic and your highlights are protected. This isn’t just gear; it’s a commitment to visual storytelling excellence. You’ve learned how to manage exposure and lock your settings. Now, it’s time to equip yourself with the tools that make those techniques shine.
Professional glass beats digital simulation every time because it handles light before it reaches your sensor. Software filters often introduce artifacts or muddy the shadows when they try to “recover” data that was never there. In contrast, our optics maintain the sharpness and contrast of your original lens while adding the physical properties you need. Maintenance is the key to longevity. Always keep your kit ready with our professional Lens Cleaning Spray. A single speck of dust can flare under the intense golden hour sun, so keep your glass pristine at all times. High-impact content starts with clean optics and the right phone camera filters for sunset.
Pro-Level Gear for Serious Creators
Our PRO 1.55X BLUE ANAMORPHIC LENS FOR SMARTPHONE is a game-changer for sunset videography. It delivers that sought-after wide-screen ratio and organic horizontal flares that define modern cinema. It turns a standard mobile clip into a cinematic experience. If your creative pursuits take you into the waves or down a mountain, check out our GoPro HERO 12 ND filters to keep your action-packed sunsets perfectly exposed. Leading influencers trust LensLab because our tools deliver technical reliability. They know that viral content requires more than just a good eye; it requires gear that doesn’t fail when the light is perfect.
Start Your Cinematic Journey Today
Building a professional creator kit doesn’t have to happen overnight. Start with the essentials, like the JJC Magnetic Lens Filter Mount Adapter for iPhone, and expand as your skills grow. Our modular system allows you to stack filters and swap lenses in seconds. This flexibility is vital when you’re chasing the sun. We provide fast shipping to ensure you’re ready for your next shoot. Join our global community of creators who are redefining what mobile production looks like. We’re your creative partner, providing the support you need to succeed. Upgrade your gear now and capture the next golden hour with the confidence of a professional. Shop the full LensLab collection and transform your mobile photography today.
Own the Golden Hour
You now have the technical foundation to transform any sunset into a professional-grade masterpiece. Physical light management isn’t just an accessory; it’s the secret to capturing the colors and details that software simply misses. By mastering the use of phone camera filters for sunset, you ensure that every highlight is preserved and every shadow remains clean. You’ve learned how to lock your exposure, shoot in RAW, and use magnetic systems to stay ahead of the fading light. This workflow is what separates casual snapshots from viral-ready visual storytelling.
Don’t let another perfect horizon go to waste. LensLab delivers the professional glass trusted by creators in over 20 countries. From our ultra-fast magnetic mounting for iPhone to our cinematic 1.55X Anamorphic options, we provide the tools you need to succeed. Upgrade your sunset shots with LensLab filters and lenses and start building a portfolio that truly stands out. Your creative potential is limitless when you have the right optics in your pocket. Go out and capture the magic of the next golden hour with total confidence.
Frequently Asked Questions
Do I really need a physical filter if my phone has Night Mode?
Yes, physical filters are essential because they manage light before it enters the lens. Night Mode uses software to brighten dark areas, but it cannot recover detail in “blown-out” white skies. Physical phone camera filters for sunset prevent overexposure at the source. This ensures your sky retains its natural gradients and deep colors. Software processing often leads to artificial artifacts; however, professional glass provides a clean, raw file for editing.
Which ND filter strength is best for sunset photography?
An ND8 or ND16 filter is usually the sweet spot for general sunset shooting. These strengths reduce light just enough to balance the bright horizon without making the foreground too dark. If you want to achieve “milky” water or smooth cloud movement, step up to an ND64. This allows for much longer shutter speeds. Always match your filter strength to the specific creative effect you want to achieve during the golden hour.
Can I use DSLR filters on my smartphone camera?
You can use DSLR filters on your phone if you have a compatible 52mm or 67mm adapter. The JJC Magnetic Lens Filter Mount Adapter for iPhone is a perfect example of this. It allows you to snap standard threaded glass onto your mobile device instantly. This bridge between mobile and professional gear gives you access to a massive range of high-quality optics. It’s a cost-effective way to use your existing professional glass on a mobile rig.
How do I stop my sunset photos from looking grainy?
Stop grain by keeping your ISO as low as possible, ideally at 100 or lower. Digital noise, or grain, occurs when the phone tries to artificially brighten a dark foreground. Using phone camera filters for sunset allows you to use a longer shutter speed to gather real light instead of relying on digital gain. Always use a tripod for these longer exposures. This combination ensures your images remain crisp and professional even in high-contrast scenes.
Will a magnetic filter mount fall off my phone?
No, professional magnetic mounts are designed with high-strength magnets that stay secure during normal use. They provide a rock-solid connection that won’t slip while you’re composing your shot. These systems are actually safer than many plastic clips that can lose their grip or shift over time. You can move and tilt your phone with confidence. Just ensure the mounting surface is clean for the best possible magnetic attraction before you start shooting.
What is the difference between a CPL and an ND filter for sunsets?
A CPL (Circular Polarizer) removes glare and boosts color saturation, while an ND (Neutral Density) filter simply reduces the total amount of light. Think of the CPL as a tool to make the oranges and blues “pop” by cutting through atmospheric haze. The ND filter is more like sunglasses that let you use slower shutter speeds for motion blur. Using them together gives you total control over both the color and the motion of your sunset composition.
Can I use filters with an anamorphic lens?
Yes, you can use filters with the PRO 1.55X BLUE ANAMORPHIC LENS FOR SMARTPHONE by using a compatible filter adapter. Many professional mobile lenses feature a standard thread size on the front element. This allows you to stack an ND filter on top of your anamorphic glass. You get the cinematic wide-screen look and the balanced exposure of a filter simultaneously. It is the ultimate setup for high-end mobile filmmaking during the golden hour.
How do I clean my phone filters without scratching them?
Use a dedicated Lens Cleaning Spray and a fresh microfiber cloth to maintain your filters. Never use your shirt or a paper towel; these can leave micro-scratches on the professional coating. Spray the liquid onto the cloth first, not directly onto the glass. Gently wipe in a circular motion from the center outward. This removes oils and dust without damaging the delicate surface of your optics, ensuring your sunset shots remain perfectly clear.