
Phone Macro Lens Not Focusing? 9 Fixes That Work
If your phone macro lens is not focusing, the cause is almost always distance: clip-on macro lenses only produce a sharp image within a narrow band, often a couple of centimeters or less from the subject. The other usual suspects are the wrong camera module, a misaligned clip, or the phone’s autofocus hunting in low light. The nine fixes below solve nearly every case.
First, understand how a clip-on macro works
A macro add-on is a close-up lens. It doesn’t make your phone “zoom”; it shifts the range where the phone can focus much closer to the lens. That’s why the image looks completely blurry at normal distances and suddenly snaps sharp when you move in. Higher magnification means a shorter working distance and a thinner slice of sharpness. Keep that in mind and most of the fixes below make immediate sense.
9 fixes for a macro lens that won’t focus
1. Move to the correct working distance
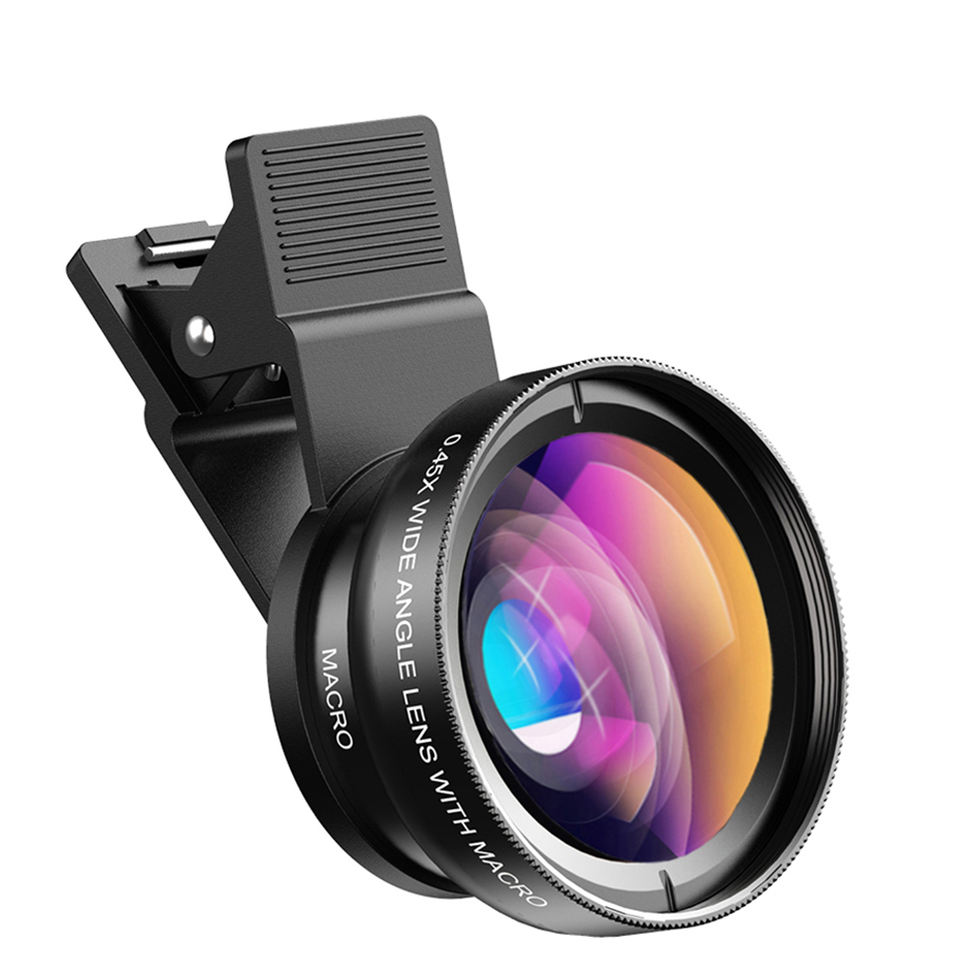
Start with the phone a few centimeters from the subject and slowly move closer, or slowly move the subject toward the lens. Watch the screen and stop the moment detail appears. If you’re using a two-in-one lens like the 12.5x macro + 0.45x wide-angle lens, remember the macro element usually has to be unscrewed from the wide element first; with both attached you’re shooting the wide-angle configuration and macro focus won’t behave the same way.
2. Use the main (1x) camera
Phones with several cameras may switch modules on their own. Your clip-on must sit over the camera that’s actually recording. Open the camera at 1x and cover each lens with a finger to see which one goes dark on screen. If you have a 2x, 3x or 5x telephoto selected, the image will be useless through a macro lens.
3. Turn off automatic macro switching
Many recent iPhones and Androids automatically jump to the ultra-wide camera when you get close to a subject. With a clip-on macro over the main camera, that switch means you’re suddenly shooting through bare glass. On iPhone, turn off Auto Macro (Settings → Camera → Macro Control lets you show a toggle). On Android, look for a “scene optimizer” or “auto macro” setting, or use a pro/manual mode, which normally stays on one lens.
4. Re-center the lens
Even a millimeter of misalignment can cause one side of the image to be soft, vignetting, or a smeared look. Clip the lens on with the screen on, look at the preview while pointing at a bright wall, and adjust until the circle of light is centered with no dark edges. If your case is thick, remove it; most clips are designed for bare phones or thin cases.
5. Lock focus, then move the phone
Autofocus is often the enemy at macro distances because it keeps hunting. Tap and hold on the subject to lock focus (AE/AF Lock on iPhone), or set manual focus to its closest position in a pro camera app. Then rock the phone gently forward and back until the subject is sharp. Photographers call this “focusing by moving,” and it’s the standard technique for high-magnification macro.
6. Add light
In dim light, the phone raises ISO, lowers shutter speed and struggles to detect contrast, so focus becomes unreliable and images look soft even when focus is correct. Shoot near a window, use a small LED, or try a lens with built-in lighting. More light also lets the phone use a faster shutter, which reduces motion blur.
7. Stabilize the phone and subject
At high magnification, a tiny movement is a big movement in the frame. Brace your elbows on a table, rest the phone on a beanbag, or use a tripod. Outdoors, a slight breeze can move a flower in and out of the focus band constantly. Shield it with your body or shoot in calm morning air. Use the self-timer or volume button so tapping the screen doesn’t shake the shot.
8. Match magnification to the subject
If you only see a blurry blob of color, you may be using too much magnification for the subject. Very strong macro lenses are designed for tiny details like fabric weave, insect eyes or skin texture. For a whole flower or a coin, choose lower magnification or a lens with a longer working distance. The 75mm super macro lens is designed to give more space between phone and subject, which makes focusing on small objects more forgiving and leaves room for light to reach the subject.
9. Clean every glass surface
A fingerprint on the phone’s camera cover, dust on the inside of the clip-on, or a hazy coating from a pocket will reduce contrast and make the phone’s autofocus fail. Wipe both sides of the add-on lens and the phone’s camera glass with a microfiber cloth.
Is it focus, or is it something else?
Sometimes the image is sharp but still looks wrong. Use this to diagnose:
- Sharp center, blurry edges: normal field curvature for strong macro lenses. Put the important detail in the center or reduce magnification.
- Everything soft and low contrast: dirty glass, misalignment, or shooting through a screen protector or case lip.
- Sharp in some frames, blurry in others: motion. Add light, stabilize, and shoot bursts.
- Dark circle around the image: wrong camera module or off-center lens. Very strong macros can also vignette slightly; crop if needed.
- Only a thin slice is sharp: that’s shallow depth of field, not a fault. Back up slightly or try focus stacking.
Settings that make macro easier
- Use a pro or manual camera mode with focus peaking if your phone offers it; highlighted edges show exactly what’s sharp.
- Shoot in burst mode and keep the sharpest frame.
- Turn off portrait mode and filters that process the image heavily.
- For video, lock focus and exposure before recording and move the subject, not the phone, for controlled reveals.
If you’re still choosing gear, our guide to the best macro lens for smartphone photography explains magnification and working distance in more detail.
Quick checklist
- Phone at 1x, auto macro switching off
- Macro element separated from wide element if it’s a 2-in-1
- Lens centered, no thick case in the way
- Start a few centimeters away and move in slowly
- Focus locked, then fine-tune by moving the phone
- Bright light and a stable support
- All glass surfaces clean
FAQ
What is the working distance of a phone macro lens?
It varies by design and magnification, from roughly a centimeter for strong macros to several centimeters for longer focal length macros. Check the product details and test by moving slowly toward a subject until it’s sharp.
Why does my macro lens work in photo mode but not video?
Some phones switch to a different camera or crop when recording video, or apply stabilization that shifts the frame. Lock to the 1x camera, check the clip alignment again in video mode, and lock focus before recording.
Can I use a macro lens with a phone case?
Thin cases are often fine, but a raised camera bump lip can push the lens away from the camera glass. If focus or vignetting is off, try without the case.
Does a stronger macro lens always mean better photos?
No. More magnification makes focus, depth of field and lighting harder. Pick magnification based on subject size.
Sharp macro starts with the right working distance.
Choose the 12.5x macro for tiny details or the 75mm super macro for a roomier working distance, and combine lenses with the Mix & Match – any 3 for $129 deal. Every lens is tested before it ships, with free worldwide shipping from our shop.