
GoPro ND Filters for Snow: Settings That Prevent Overexposure
The right GoPro ND filter for snow depends on the light: on bright, sunny snow use the strongest filter in your set (ND32), in mixed sun and cloud use ND16, and in flat light or overcast conditions ND8 or less. Pair the filter with exposure compensation around −0.5, a capped ISO, and a locked white balance, and your snow keeps its texture instead of turning into a white blob.
Why snow is hard for action cameras
Fresh snow reflects most of the light that hits it, and at altitude the light is intense. Your GoPro has a fixed aperture, so it controls exposure only with shutter speed and ISO. In bright snow it chooses extremely fast shutter speeds, which freeze every frame and make fast motion look jittery. Meanwhile, the bright scene can clip highlights, wiping out snow texture and detail in white jackets.
An ND filter reduces the light reaching the sensor so the camera can use slower shutter speeds, which brings back natural motion blur. It doesn’t change the scene’s dynamic range, so you still need smart exposure settings to protect highlights.
Which ND strength for which snow conditions
These starting points assume 30 or 60 fps:
- Bluebird day, fresh snow, high altitude: ND32. Even this won’t always reach the 180-degree shutter target in very bright conditions, but it noticeably smooths motion.
- Sunny with some cloud, or late afternoon sun: ND16.
- Overcast, light snowfall: ND8.
- Flat light, fog, heavy snowfall, tree runs in shade: ND4 or no filter.
- Night skiing or indoor slopes: no filter.
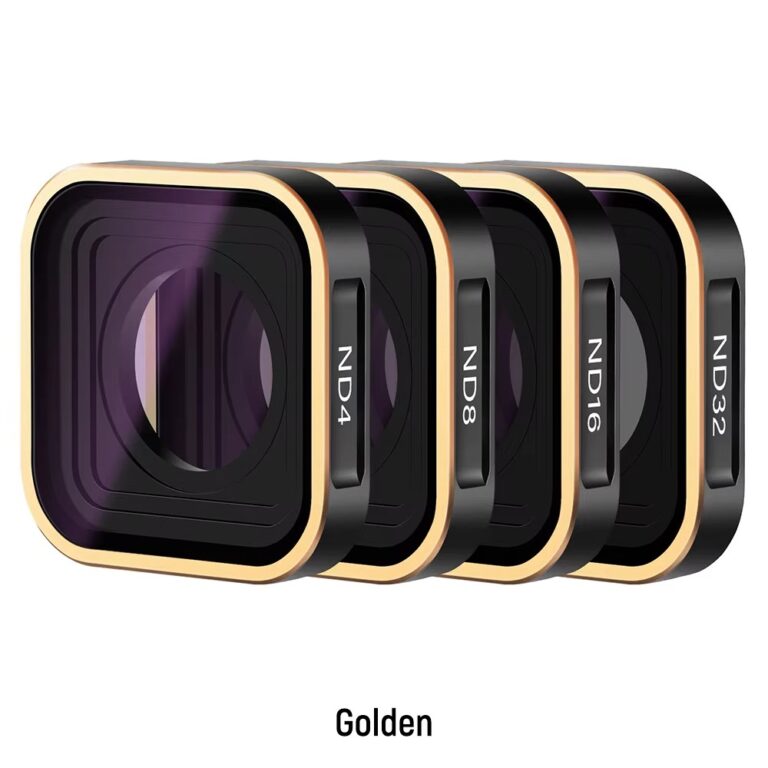
The 4-pack ND filter set (ND4, ND8, ND16, ND32) for GoPro HERO 12/11/10/9 covers this whole range. Bring all four; mountain light changes quickly as clouds roll in and you move between open slopes and trees.
Settings that prevent overexposure
Exposure compensation (EV)
Start at −0.5 EV on bright snow. This protects highlight detail. If your shadows look too dark, go back toward 0; if snow still looks clipped, try −1.0. Check a short test clip on the camera screen or your phone before your first run.
ISO limits
In Protune, set ISO Min to the lowest value and ISO Max to a modest level (for example 400 to 800) for bright conditions. That keeps the image clean and stops the camera from boosting gain in shady sections.
Shutter
Leave shutter on Auto unless your ND is strong enough. If you lock the shutter at 1/60 but the filter is too weak, the camera can’t reduce ISO below its base and the footage will overexpose. With ND and auto shutter, the camera simply chooses a slower speed than it would without the filter.
White balance
Auto white balance can tint snow blue or gray as conditions change. Lock it around 5500K in sun and slightly higher (warmer) in shade or overcast, adjusting by eye for your camera.
Color profile
A flat or log profile retains more highlight detail if you’re comfortable color grading. If you want ready-to-post footage, use the natural profile and lower sharpness to avoid crunchy-looking snow.
Frame rate
60 fps gives smooth motion and slow-motion options. 30 fps works well with ND for a more cinematic feel.
Step-by-step on the mountain
- Before leaving the lodge, swap on the ND for current conditions with the camera off and your hands dry. Changing filters in snowfall risks moisture on the sensor cover.
- Record a 10-second test and check that the snow shows texture.
- Adjust EV rather than changing filters for small exposure differences.
- Swap filters when the light changes significantly, such as moving from bright open slopes into dense trees, or when heavy cloud rolls in.
- Keep spare filters in an inside pocket so they stay warm and fog-free.
ND filters and stabilization
With slower shutter speeds, stabilization can sometimes reveal motion blur “shimmer” around high-contrast edges, especially on bumpy terrain. If you see it, use a slightly weaker ND to raise shutter speed a little, or accept it as part of the motion-blur look. Most viewers find smooth motion more pleasant than staccato freeze-frames.
What about the Max Lens Mod?
The GoPro HERO13 Max Lens Mod gives an ultra-wide view and full Horizon Lock, great for tumbling park laps and tree runs. It replaces the same lens cover the ND filters replace, so you generally can’t use both at once. Many riders run the Max Lens Mod for action laps and switch to the standard cover with ND for scenic, cinematic runs.
Cold-weather care
- Cold drains batteries quickly. Carry spares in an inner pocket.
- Avoid bringing a frozen camera straight into a warm lodge; condensation can form. Let it warm gradually in a bag.
- Wipe snow off the filter with a soft cloth, not your glove.
- Check filters for scratches after a fall.
Quick checklist
- All four ND filters packed, spares kept warm
- ND32 on bluebird days, ND16 for mixed, ND8 or less for flat light
- EV around −0.5, ISO capped
- Shutter on Auto unless ND is strong enough
- White balance locked
- Test clip before the first run
- Swap filters indoors or in sheltered spots
For tips on keeping your filters spotless, see our guide on cleaning lenses; the same principles apply to GoPro glass.
FAQ
Why does my snow footage look gray?
The camera may be underexposing to protect highlights, or the white balance is off. Raise EV slightly and lock white balance.
Why does my snow footage look blown out?
Highlights are clipping. Lower EV, use a stronger ND, and cap ISO.
Do I need ND filters for snowboarding videos?
Not strictly, but they produce smoother, more cinematic motion and help with exposure in very bright conditions.
Can I use ND filters for night skiing?
No. Remove them in low light; they’d only push ISO up and add noise.
Keep the powder white, not blown out.
Pack the GoPro ND 4-pack for every kind of mountain light and the Max Lens Mod for leveled action laps, and if you film on your phone too, check the Mix & Match – any 3 for $129 offer. Free worldwide shipping on everything in the shop.